How Do I Create Groups in My Account?
CareerPrepped makes it easy to organize users into groups. Groups help you manage students by class, program, instructor, or any structure that fits your needs. Every group you create gets a group code that students can use to sign up and be automatically affiliated.
🔐 Who Can Create Groups?
If you have admin privileges, you can access the Admin Panel by clicking your avatar (top-right corner) and selecting Admin Panel from the drop-down menu.
Primary Admins of organizational Talent Developer accounts can create unlimited main groups and designate unlimited Group Admins.
Group Admins can create unlimited subgroups under any group they manage and designate Group Admins.
Educator (individual) accounts can only create 1 group.
🧩 How to Create a Main Group
(Only for Primary Admins of an Organization)
Sign in at careerprepped.com
Click your avatar in the upper-right corner
Select Admin Panel
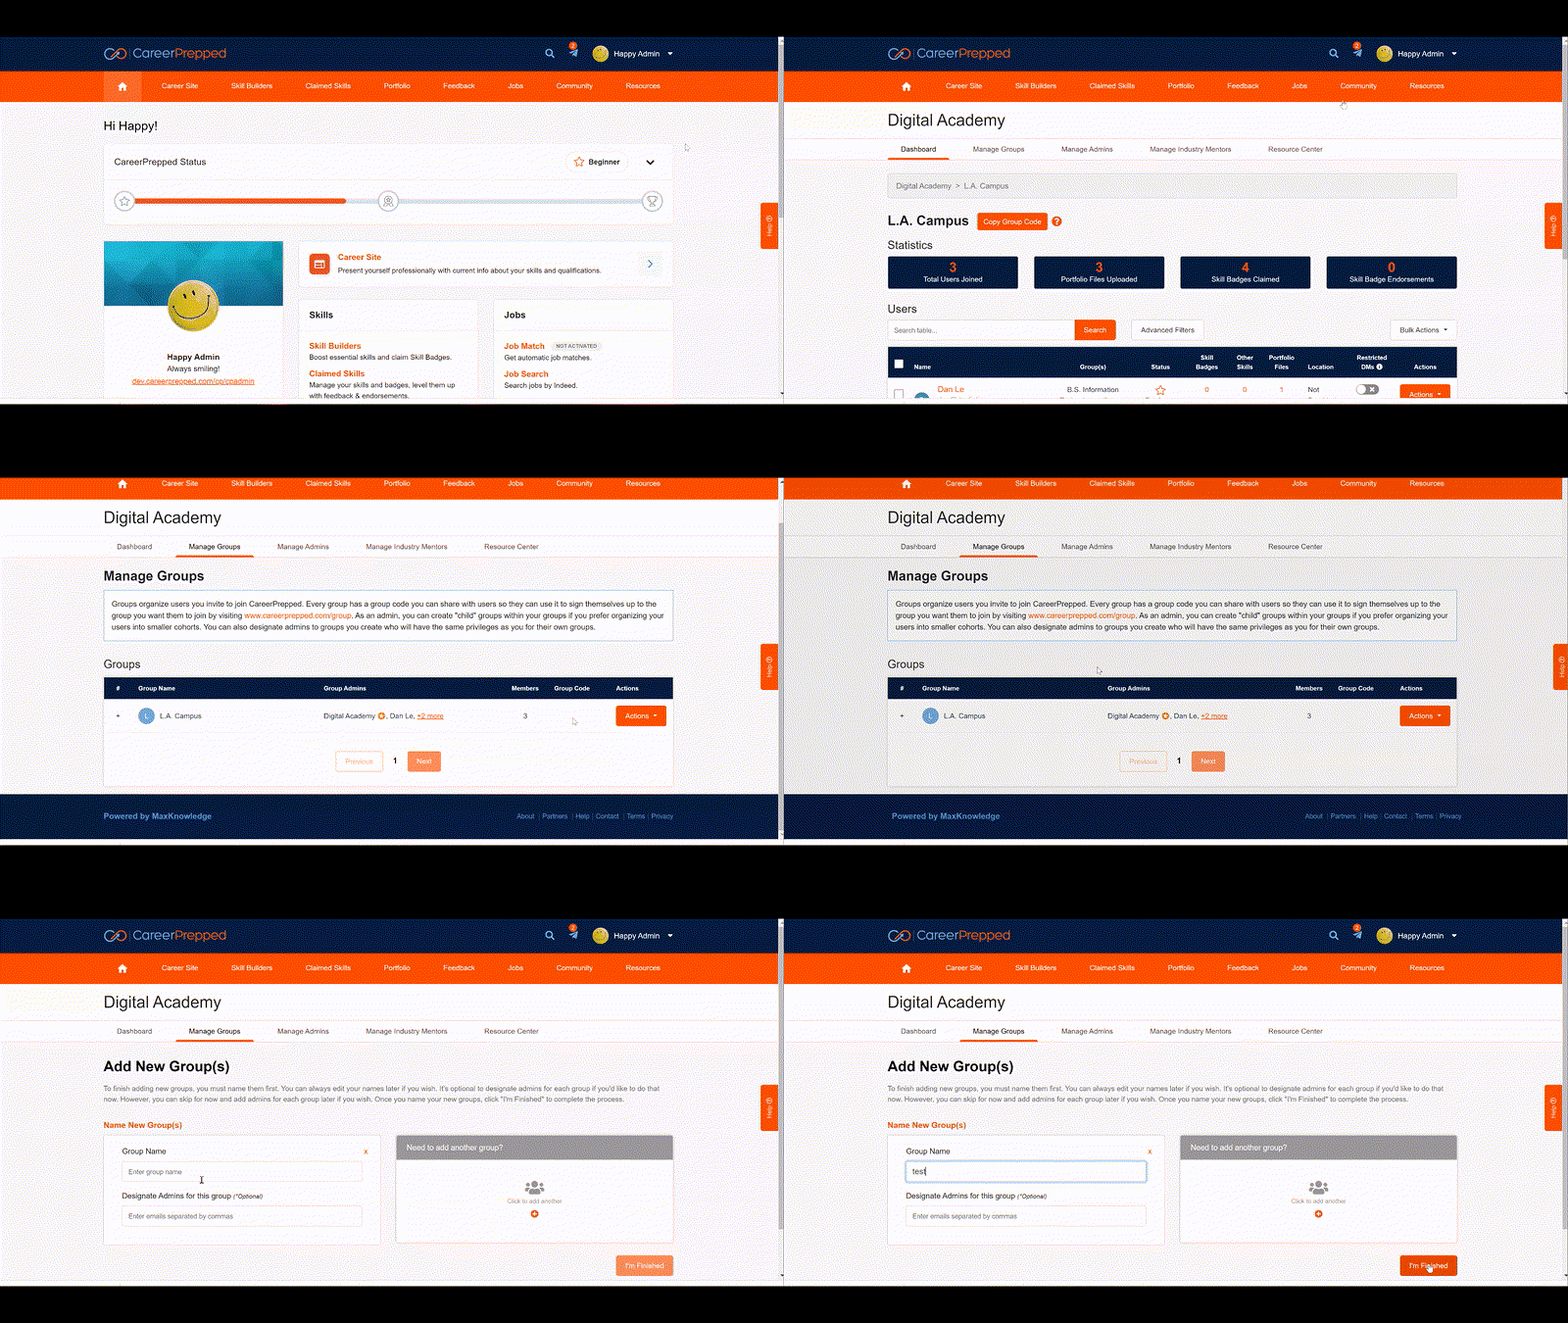
Click the Manage Group(s) tab
Click + Add New Group
Choose how many groups to add (up to 10 at a time), then click Continue
Enter a unique name for each group
(Optional) Add Group Admins by entering their email addresses (separate with commas)
Click I'm Finished
📌 Each group will have a unique code you can share with students. They’ll sign up at careerprepped.com/group using this code.
📽️ See the animated GIF below for a step-by-step visual walkthrough.
🌱 How to Create a Child Group
(Only for Group Admins)
Sign in at careerprepped.com
Click your avatar in the upper-right corner
Select Admin Panel
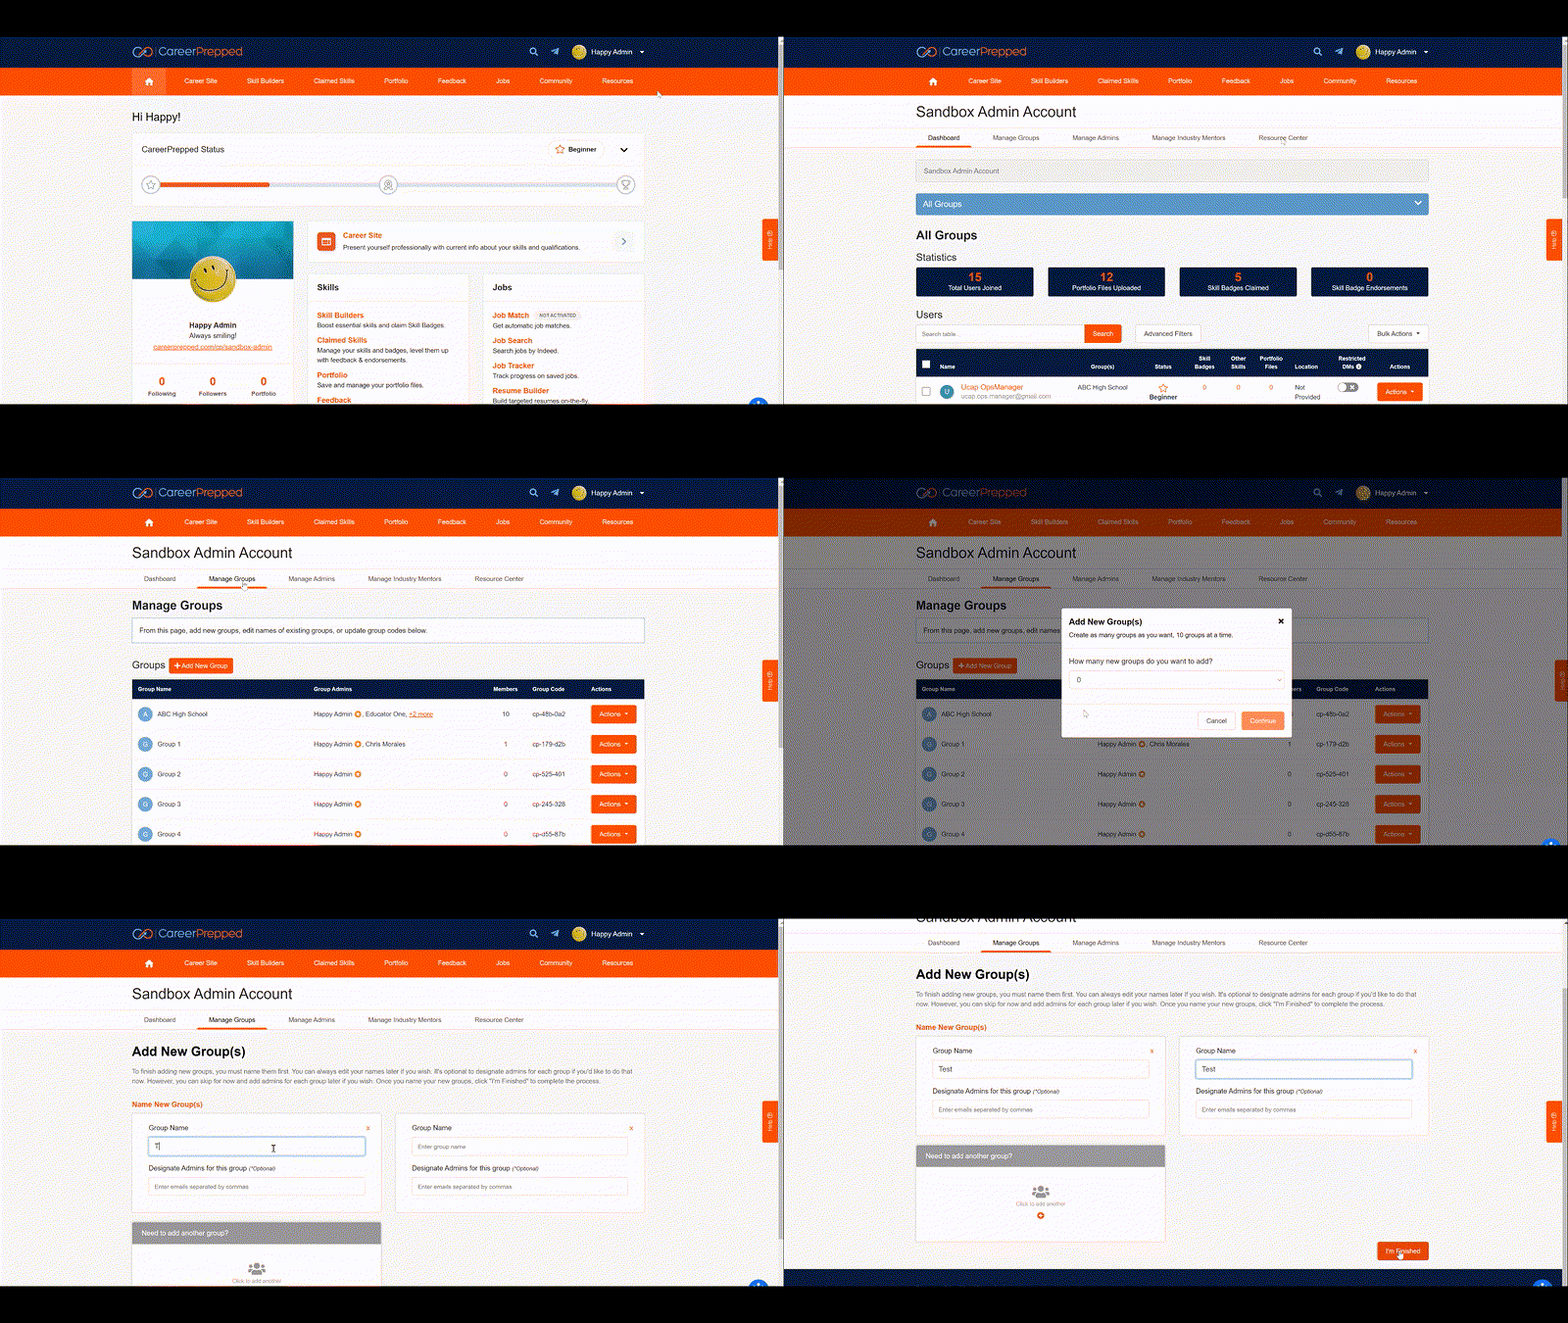
Click the Manage Group(s) tab
Click Actions next to the group you want to add child groups under
Select Add Child Group(s)
Choose how many child groups to add (up to 10), then click Continue
Enter a unique name for each group
(Optional) Add Group Admins by entering their email addresses (separate with commas)
Click I'm Finished
📽️ See the animated GIF below for a step-by-step visual walkthrough.